自己署名証明書(いわゆる、オレオレ証明書)の
サーバー証明書、クライアント認証証明書、S/MIME証明書、コードサイニング証明書、ドキュメントサイニング証明書が無制限に発行可能となる。
手順に従って進めば、OpenSSLでプライベートCA(認証局)の構築が可能。
Windows OSおよびLinux OSを扱った経験のある方を前提に記載している。
動作環境
Windows上に仮想環境のVMware Workstation 16 Playerをインストールし、Cent OSの後継OSであるRocky Linuxをインストール。
Microsoft Windows 10
└VMware Workstation 16 Player
└Rocky Linux 8.6
└OpenSSL 1.1.1k FIPS 25 Mar 2021
└Apache (httpd-2.4.37-47.module+el8.6.0+823+f143cee1.1.x86_64)
CA構成
OpenSSLで3階層のCA構築(Root CA + 中間CA + EE証明書)
□Root CA → CN=RCA(25年)・・・RCAの自己署名証明書
└□中間CA → CN=SCA01(15年)・・・RCAから下位のCA:SCA01のCA証明書に署名
└□EE(End Entity)証明書 → CN=www1.example.com(825日)・・・SCA01からEE証明書へ署名
発行したEE証明書は、Apacheで公開しているウェブサーバー上に適用する予定。
http://www1.example.com/
CRLの構成
中間CA証明書に記載されるCRL Distribution Point(Root CAのPrivate keyで署名)
・中間CA証明書の有効性をこのURLにブラウザがアクセスすることによって検証
http://www1.example.com/RCAcrl.crl
EE証明書に記載されるCRL Distribution Point(中間CAのPrivate keyで署名)
・EE証明書の有効性をこのURLにブラウザがアクセスすることによって検証
http://www1.example.com/SCA01crl.crl
VMware Workstation PlayerとRocky Linuxのインストール
VMware Workstation PlayerとRocky Linuxのインストールは、以下URL参照。
VMware Workstation PlayerにRocky Linux(8.6)をインストール | Japanese PKI Blog (world-tls.com)
CAサーバー構築
(1)CA構築準備
Root CA、Subordinate CA、End Entity Certificate環境の作成
mkdir /etc/pki/tls/myca
mkdir /etc/pki/tls/myca/RCA
mkdir -p /etc/pki/tls/myca/RCA/certs
mkdir -p /etc/pki/tls/myca/RCA/crl
mkdir -p /etc/pki/tls/myca/RCA/newcerts
mkdir -p /etc/pki/tls/myca/RCA/private
touch /etc/pki/tls/myca/RCA/index.txt
echo 00 > /etc/pki/tls/myca/RCA/crlnumber
mkdir /etc/pki/tls/myca/SCA01
mkdir -p /etc/pki/tls/myca/SCA01/certs
mkdir -p /etc/pki/tls/myca/SCA01/crl
mkdir -p /etc/pki/tls/myca/SCA01/newcerts
mkdir -p /etc/pki/tls/myca/SCA01/private
touch /etc/pki/tls/myca/SCA01/index.txt
echo 00 > /etc/pki/tls/myca/SCA01/crlnumber
Root CA証明書用のcnfファイル編集
cd /etc/pki/tls
cp openssl.cnf /etc/pki/tls/myca/RCA/openssl-RCA.cnf
cp openssl.cnf /etc/pki/tls/myca/SCA01/openssl-SCA01.cnf
vim /etc/pki/tls/myca/RCA/openssl-RCA.cnf
以下、編集する
変更前 openssl.cnf
#
# OpenSSL example configuration file.
# This is mostly being used for generation of certificate requests.
#

# Note that you can include other files from the main configuration
# file using the .include directive.
#.include filename

# This definition stops the following lines choking if HOME isn't
# defined.
HOME			= .

# Extra OBJECT IDENTIFIER info:
#oid_file		= $ENV::HOME/.oid
oid_section		= new_oids

# To use this configuration file with the "-extfile" option of the
# "openssl x509" utility, name here the section containing the
# X.509v3 extensions to use:
# extensions		=
# (Alternatively, use a configuration file that has only
# X.509v3 extensions in its main [= default] section.)

# Load default TLS policy configuration

openssl_conf = default_modules

[ default_modules ]

ssl_conf = ssl_module

[ ssl_module ]

system_default = crypto_policy

[ crypto_policy ]

.include /etc/crypto-policies/back-ends/opensslcnf.config

[ new_oids ]

# We can add new OIDs in here for use by 'ca', 'req' and 'ts'.
# Add a simple OID like this:
# testoid1=1.2.3.4
# Or use config file substitution like this:
# testoid2=${testoid1}.5.6

# Policies used by the TSA examples.
tsa_policy1 = 1.2.3.4.1
tsa_policy2 = 1.2.3.4.5.6
tsa_policy3 = 1.2.3.4.5.7

####################################################################
[ ca ]
default_ca	= CA_default		# The default ca section

####################################################################
[ CA_default ]

dir		= /etc/pki/CA		# Where everything is kept
certs		= $dir/certs		# Where the issued certs are kept
crl_dir		= $dir/crl		# Where the issued crl are kept
database	= $dir/index.txt	# database index file.
#unique_subject	= no			# Set to 'no' to allow creation of
					# several certs with same subject.
new_certs_dir	= $dir/newcerts		# default place for new certs.

certificate	= $dir/cacert.pem 	# The CA certificate
serial		= $dir/serial 		# The current serial number
crlnumber	= $dir/crlnumber	# the current crl number
					# must be commented out to leave a V1 CRL
crl		= $dir/crl.pem 		# The current CRL
private_key	= $dir/private/cakey.pem# The private key

x509_extensions	= usr_cert		# The extensions to add to the cert

# Comment out the following two lines for the "traditional"
# (and highly broken) format.
name_opt 	= ca_default		# Subject Name options
cert_opt 	= ca_default		# Certificate field options

# Extension copying option: use with caution.
# copy_extensions = copy

# Extensions to add to a CRL. Note: Netscape communicator chokes on V2 CRLs
# so this is commented out by default to leave a V1 CRL.
# crlnumber must also be commented out to leave a V1 CRL.
# crl_extensions	= crl_ext

default_days	= 365			# how long to certify for
default_crl_days= 30			# how long before next CRL
default_md	= sha256		# use SHA-256 by default
preserve	= no			# keep passed DN ordering

# A few difference way of specifying how similar the request should look
# For type CA, the listed attributes must be the same, and the optional
# and supplied fields are just that :-)
policy		= policy_match

# For the CA policy
[ policy_match ]
countryName		= match
stateOrProvinceName	= match
organizationName	= match
organizationalUnitName	= optional
commonName		= supplied
emailAddress		= optional

# For the 'anything' policy
# At this point in time, you must list all acceptable 'object'
# types.
[ policy_anything ]
countryName		= optional
stateOrProvinceName	= optional
localityName		= optional
organizationName	= optional
organizationalUnitName	= optional
commonName		= supplied
emailAddress		= optional

####################################################################
[ req ]
default_bits		= 2048
default_md		= sha256
default_keyfile 	= privkey.pem
distinguished_name	= req_distinguished_name
attributes		= req_attributes
x509_extensions	= v3_ca	# The extensions to add to the self signed cert

# Passwords for private keys if not present they will be prompted for
# input_password = secret
# output_password = secret

# This sets a mask for permitted string types. There are several options.
# default: PrintableString, T61String, BMPString.
# pkix	 : PrintableString, BMPString (PKIX recommendation before 2004)
# utf8only: only UTF8Strings (PKIX recommendation after 2004).
# nombstr : PrintableString, T61String (no BMPStrings or UTF8Strings).
# MASK:XXXX a literal mask value.
# WARNING: ancient versions of Netscape crash on BMPStrings or UTF8Strings.
string_mask = utf8only

# req_extensions = v3_req # The extensions to add to a certificate request

[ req_distinguished_name ]
countryName			= Country Name (2 letter code)
countryName_default		= XX
countryName_min			= 2
countryName_max			= 2

stateOrProvinceName		= State or Province Name (full name)
#stateOrProvinceName_default	= Default Province

localityName			= Locality Name (eg, city)
localityName_default		= Default City

0.organizationName		= Organization Name (eg, company)
0.organizationName_default	= Default Company Ltd

# we can do this but it is not needed normally :-)
#1.organizationName		= Second Organization Name (eg, company)
#1.organizationName_default	= World Wide Web Pty Ltd

organizationalUnitName		= Organizational Unit Name (eg, section)
#organizationalUnitName_default	=

commonName			= Common Name (eg, your name or your server\'s hostname)
commonName_max			= 64

emailAddress			= Email Address
emailAddress_max		= 64

# SET-ex3			= SET extension number 3

[ req_attributes ]
challengePassword		= A challenge password
challengePassword_min		= 4
challengePassword_max		= 20

unstructuredName		= An optional company name

[ usr_cert ]

# These extensions are added when 'ca' signs a request.

# This goes against PKIX guidelines but some CAs do it and some software
# requires this to avoid interpreting an end user certificate as a CA.

basicConstraints=CA:FALSE

# Here are some examples of the usage of nsCertType. If it is omitted
# the certificate can be used for anything *except* object signing.

# This is OK for an SSL server.
# nsCertType			= server

# For an object signing certificate this would be used.
# nsCertType = objsign

# For normal client use this is typical
# nsCertType = client, email

# and for everything including object signing:
# nsCertType = client, email, objsign

# This is typical in keyUsage for a client certificate.
# keyUsage = nonRepudiation, digitalSignature, keyEncipherment

# This will be displayed in Netscape's comment listbox.
nsComment			= "OpenSSL Generated Certificate"

# PKIX recommendations harmless if included in all certificates.
subjectKeyIdentifier=hash
authorityKeyIdentifier=keyid,issuer

# This stuff is for subjectAltName and issuerAltname.
# Import the email address.
# subjectAltName=email:copy
# An alternative to produce certificates that aren't
# deprecated according to PKIX.
# subjectAltName=email:move

# Copy subject details
# issuerAltName=issuer:copy

#nsCaRevocationUrl		= http://www.domain.dom/ca-crl.pem
#nsBaseUrl
#nsRevocationUrl
#nsRenewalUrl
#nsCaPolicyUrl
#nsSslServerName

# This is required for TSA certificates.
# extendedKeyUsage = critical,timeStamping

[ v3_req ]

# Extensions to add to a certificate request

basicConstraints = CA:FALSE
keyUsage = nonRepudiation, digitalSignature, keyEncipherment

[ v3_ca ]


# Extensions for a typical CA


# PKIX recommendation.

subjectKeyIdentifier=hash

authorityKeyIdentifier=keyid:always,issuer

basicConstraints = critical,CA:true

# Key usage: this is typical for a CA certificate. However since it will
# prevent it being used as an test self-signed certificate it is best
# left out by default.
# keyUsage = cRLSign, keyCertSign

# Some might want this also
# nsCertType = sslCA, emailCA

# Include email address in subject alt name: another PKIX recommendation
# subjectAltName=email:copy
# Copy issuer details
# issuerAltName=issuer:copy

# DER hex encoding of an extension: beware experts only!
# obj=DER:02:03
# Where 'obj' is a standard or added object
# You can even override a supported extension:
# basicConstraints= critical, DER:30:03:01:01:FF

[ crl_ext ]

# CRL extensions.
# Only issuerAltName and authorityKeyIdentifier make any sense in a CRL.

# issuerAltName=issuer:copy
authorityKeyIdentifier=keyid:always

[ proxy_cert_ext ]
# These extensions should be added when creating a proxy certificate

# This goes against PKIX guidelines but some CAs do it and some software
# requires this to avoid interpreting an end user certificate as a CA.

basicConstraints=CA:FALSE

# Here are some examples of the usage of nsCertType. If it is omitted
# the certificate can be used for anything *except* object signing.

# This is OK for an SSL server.
# nsCertType			= server

# For an object signing certificate this would be used.
# nsCertType = objsign

# For normal client use this is typical
# nsCertType = client, email

# and for everything including object signing:
# nsCertType = client, email, objsign

# This is typical in keyUsage for a client certificate.
# keyUsage = nonRepudiation, digitalSignature, keyEncipherment

# This will be displayed in Netscape's comment listbox.
nsComment			= "OpenSSL Generated Certificate"

# PKIX recommendations harmless if included in all certificates.
subjectKeyIdentifier=hash
authorityKeyIdentifier=keyid,issuer

# This stuff is for subjectAltName and issuerAltname.
# Import the email address.
# subjectAltName=email:copy
# An alternative to produce certificates that aren't
# deprecated according to PKIX.
# subjectAltName=email:move

# Copy subject details
# issuerAltName=issuer:copy

#nsCaRevocationUrl		= http://www.domain.dom/ca-crl.pem
#nsBaseUrl
#nsRevocationUrl
#nsRenewalUrl
#nsCaPolicyUrl
#nsSslServerName

# This really needs to be in place for it to be a proxy certificate.
proxyCertInfo=critical,language:id-ppl-anyLanguage,pathlen:3,policy:foo

####################################################################
[ tsa ]

default_tsa = tsa_config1	# the default TSA section

[ tsa_config1 ]

# These are used by the TSA reply generation only.
dir		= /etc/pki/CA		# TSA root directory
serial		= $dir/tsaserial	# The current serial number (mandatory)
crypto_device	= builtin		# OpenSSL engine to use for signing
signer_cert	= $dir/tsacert.pem 	# The TSA signing certificate
					# (optional)
certs		= $dir/cacert.pem	# Certificate chain to include in reply
					# (optional)
signer_key	= $dir/private/tsakey.pem # The TSA private key (optional)
signer_digest  = sha256			# Signing digest to use. (Optional)
default_policy	= tsa_policy1		# Policy if request did not specify it
					# (optional)
other_policies	= tsa_policy2, tsa_policy3	# acceptable policies (optional)
digests     = sha1, sha256, sha384, sha512  # Acceptable message digests (mandatory)
accuracy	= secs:1, millisecs:500, microsecs:100	# (optional)
clock_precision_digits  = 0	# number of digits after dot. (optional)
ordering		= yes	# Is ordering defined for timestamps?
				# (optional, default: no)
tsa_name		= yes	# Must the TSA name be included in the reply?
				# (optional, default: no)
ess_cert_id_chain	= no	# Must the ESS cert id chain be included?
				# (optional, default: no)
ess_cert_id_alg		= sha256	# algorithm to compute certificate
				# identifier (optional, default: sha1)
dir=/etc/pki/tls/myca/RCA は、パスの変更
keyUsage = cRLSign, keyCertSign は、コメント解除する。
openssl-RCA.cnf
[ CA_default ]
dir=/etc/pki/tls/myca/RCA
unique_subject = no            # Set to 'no' to allow creation of
default_days	= 9125			# how long to certify for
[ req ]
default_bits            = 4096
[ v3_ca ]
keyUsage = critical, digitalSignature, cRLSign, keyCertSign
(2)Root CAを構築 25years
CSRとPrivate keyを生成
cd /etc/pki/tls/myca/RCA
openssl req -config /etc/pki/tls/myca/RCA/openssl-RCA.cnf -new -keyout private/cakey.pem -out csr.pem
PEM pass phrase(例)1111a
以下入力する。
Country Name (2 letter code) [XX]:JP
State or Province Name (full name) []:Tokyo
Locality Name (eg, city) [Default City]:.
Organization Name (eg, company) [Default Company Ltd]:CA
Organizational Unit Name (eg, section) []:.
Common Name (eg, your name or your server's hostname) []:RCA
Email Address []:

Please enter the following 'extra' attributes
to be sent with your certificate request
A challenge password []:
An optional company name []:
★Root CA証明書(cacert.pem)に自己署名し、発行する。(-create_serialでシリアル番号を生成)
openssl ca -config /etc/pki/tls/myca/RCA/openssl-RCA.cnf -create_serial -out cacert.pem -batch -keyfile private/cakey.pem -selfsign -extensions v3_ca -infiles csr.pemPEM pass phrase(例)1111a
(3)中間CAを構築 15years
CSRにRoot CA証明書で署名をし、中間CA証明書(../SCA01/cacert.pem)を作成
vim /etc/pki/tls/myca/SCA01/openssl-SCA01.cnf以下、「openssl-SCA01.cnf」を編集する(crlDistributionPointsは、適宜FQDN部分を変更)
OCSPレスポンダーを準備する場合は、[ v3_ca ]で以下に置き換え。
authorityInfoAccess = OCSP;URI:http://www1.example.com:8080, caIssuers;URI:http://www1.example.com/RCA.crtopenssl-SCA01.cnf
[ CA_default ]
dir=/etc/pki/tls/myca/RCA
unique_subject = no            # Set to 'no' to allow creation of
default_days	= 5475			# how long to certify for
default_crl_days= 365			# how long before next CRL
[ req ]
default_bits            = 4096
[ v3_ca ]
keyUsage = critical, digitalSignature, cRLSign, keyCertSign
crlDistributionPoints = URI:http://www1.example.com/RCAcrl.crl
authorityInfoAccess = caIssuers;URI:http://www1.example.com/RCA.crt
【スキップしてよい項目】
名前の制限(nameConstraints)を含む場合は以下を実施(通常は実施不要)
発行先の限定をしたい場合は、以下も追記する。
(例)example.comとexample2.comにしたい場合
RFC5280:https://tools.ietf.org/html/rfc5280#section-4.2.1.10
openssl-SCA01.cnf
nameConstraints=critical,@name_constraints
[ name_constraints ]
permitted;DNS.1=example.com
permitted;DNS.2=example2.com
permitted;dirName.1=dir_name_1
permitted;dirName.2=dir_name_2
excluded;IP.1=0.0.0.0/0.0.0.0
excluded;IP.2=0000:0000:0000:0000:0000:0000:0000:0000/0000:0000:0000:0000:0000:0000:0000:0000
[ dir_name_1 ]
C=JP
ST=Tokyo
O=CA
[ dir_name_2 ]
C=JP
ST=Tokyo
O=CA2
CSRとPrivate keyを生成
cd /etc/pki/tls/myca/SCA01
openssl req -config /etc/pki/tls/myca/SCA01/openssl-SCA01.cnf -new -keyout private/cakey.pem -out csr.pem
PEM pass phrase(例)2222a
以下入力する。
Country Name (2 letter code) [XX]:JP
State or Province Name (full name) []:Tokyo
Locality Name (eg, city) [Default City]:.
Organization Name (eg, company) [Default Company Ltd]:CA
Organizational Unit Name (eg, section) []:.
Common Name (eg, your name or your server's hostname) []:SCA01
Email Address []:

Please enter the following 'extra' attributes
to be sent with your certificate request
A challenge password []:
An optional company name []:
★Root CA証明書のPrivate keyで中間CA証明書に署名し発行する。(RCAのシリアルに1プラスした値で発行される)
cd /etc/pki/tls/myca/SCA01
openssl ca -config /etc/pki/tls/myca/SCA01/openssl-SCA01.cnf -out cacert.pem -extensions v3_ca -infiles csr.pem
RCAのPEM pass phrase(例)1111a
証明書チェーンを作成
・Root CA証明書と中間CA証明書のチェーンを確認
・連結して証明書チェーン(RS01-chain.pem)を作成
cd /etc/pki/tls/myca
openssl x509 -outform pem -in RCA/cacert.pem -out RCA.pem
openssl x509 -outform pem -in SCA01/cacert.pem -out SCA01.pem
openssl verify -CAfile RCA.pem SCA01.pem
cat SCA01.pem RCA.pem >> RS01-chain.pem
(4-1)EE証明書を作成(RSAの場合)
証明書プロファイルの設定(SAN[SubjectAltName]とCRL DPを含む)
mkdir /etc/pki/tls/myca/SCA01-EE-S01
cp /etc/pki/tls/openssl.cnf /etc/pki/tls/myca/SCA01-EE-S01/openssl-SCA01-EE-S01.cnf
vim /etc/pki/tls/myca/SCA01-EE-S01/openssl-SCA01-EE-S01.cnf
以下、「openssl-SCA01-EE-S01.cnf」を編集する(crlDistributionPointsは、適宜FQDN部分を変更)
OCSPレスポンダーを準備する場合は、[ v3_ca ]で以下に置き換え。
authorityInfoAccess = OCSP;URI:http://www1.example.com:8081, caIssuers;URI:http://www1.example.com/SCA01.crtopenssl-SCA01-EE-S01.cnf
[ CA_default ]
dir=/etc/pki/tls/myca/SCA01
unique_subject = no            # Set to 'no' to allow creation of
default_days	= 825			# how long to certify for
default_crl_days= 365			# how long before next CRL
[ usr_cert ]
keyUsage = critical, digitalSignature, keyEncipherment
extendedKeyUsage = serverAuth
crlDistributionPoints = URI:http://www1.example.com/SCA01crl.crl
authorityInfoAccess = caIssuers;URI:http://www1.example.com/SCA01.crt
subjectAltName=DNS:www1.example.com, IP:192.168.0.160
#nsComment			= "OpenSSL Generated Certificate"
ドキュメントサイニング証明書やコードサイニング証明書の場合は、以下の値に置き換え。
# MicrosoftのドキュメントサインOIDの場合
extendedKeyUsage = 1.3.6.1.4.1.311.10.3.12
# コードサイニング証明書
の場合
extendedKeyUsage = codeSigning
Private keyを生成
・PEM pass phrase(例)3333a
cd /etc/pki/tls/myca/SCA01-EE-S01
openssl genrsa -aes256 2048 > SCA01-EE-S01_key.pem
Private keyのパスフレーズを解除
・PEM pass phrase(例)3333a
openssl rsa -in SCA01-EE-S01_key.pem -out SCA01-EE-S01_key.pemCSRを生成
openssl req -config /etc/pki/tls/myca/SCA01-EE-S01/openssl-SCA01-EE-S01.cnf -new -key SCA01-EE-S01_key.pem -out SCA01-EE-S01_csr.pem以下入力する。
Country Name (2 letter code) [XX]:JP
State or Province Name (full name) []:Tokyo
Locality Name (eg, city) [Default City]:.
Organization Name (eg, company) [Default Company Ltd]:CA
Organizational Unit Name (eg, section) []:.
Common Name (eg, your name or your server's hostname) []:www1.example.com
Email Address []:

Please enter the following 'extra' attributes
to be sent with your certificate request
A challenge password []:
An optional company name []:
★中間CA証明書のPrivate keyでEE証明書に署名し、発行する。
(/SCA01-EE-S01/SCA01-EE-S01_csr.pemを使用し、有効期間825日で発行)
cd /etc/pki/tls/myca/SCA01
openssl ca -config /etc/pki/tls/myca/SCA01-EE-S01/openssl-SCA01-EE-S01.cnf -create_serial -batch -in ../SCA01-EE-S01/SCA01-EE-S01_csr.pem -keyfile private/cakey.pem -cert cacert.pem -out ../SCA01-EE-S01/SCA01-EE-S01.crt -policy policy_anything
PEM pass phrase(例)2222a
EE証明書を検証
cd /etc/pki/tls/myca
openssl verify -CAfile RS01-chain.pem SCA01-EE-S01/SCA01-EE-S01.crt
(4-2)EE証明書を作成(ECCの場合)
証明書プロファイルの設定(SAN[SubjectAltName]とCRL DPを含む)
mkdir /etc/pki/tls/myca/SCA01-EE-S02
cp /etc/pki/tls/openssl.cnf /etc/pki/tls/myca/SCA01-EE-S02/openssl-SCA01-EE-S02.cnf
vim /etc/pki/tls/myca/SCA01-EE-S02/openssl-SCA01-EE-S02.cnf
以下、「openssl-SCA01-EE-S02.cnf」を編集する(crlDistributionPointsは、適宜FQDN部分を変更)
OCSPレスポンダーを準備する場合は、[ v3_ca ]で以下に置き換え。
authorityInfoAccess = OCSP;URI:http://www1.example.com:8081, caIssuers;URI:http://www1.example.com/SCA01.crtopenssl-SCA01-EE-S02.cnf
[ CA_default ]
dir=/etc/pki/tls/myca/SCA01
unique_subject = no            # Set to 'no' to allow creation of
default_days	= 825			# how long to certify for
default_crl_days= 365			# how long before next CRL
[ usr_cert ]
keyUsage = critical, digitalSignature
extendedKeyUsage = serverAuth
crlDistributionPoints = URI:http://www1.example.com/SCA01crl.crl
authorityInfoAccess = caIssuers;URI:http://www1.example.com/SCA01.crt
subjectAltName=DNS:www1.example.com, IP:192.168.0.160
#nsComment			= "OpenSSL Generated Certificate"
Private keyを生成
cd /etc/pki/tls/myca/SCA01-EE-S02
openssl ecparam -out SCA01-EE-S02_key.pem -name prime256v1 -genkey
CSRを生成
openssl req -config /etc/pki/tls/myca/SCA01-EE-S02/openssl-SCA01-EE-S02.cnf -new -key SCA01-EE-S02_key.pem -out SCA01-EE-S02_csr.pem -sha256以下入力する。
Country Name (2 letter code) [XX]:JP
State or Province Name (full name) []:Tokyo
Locality Name (eg, city) [Default City]:.
Organization Name (eg, company) [Default Company Ltd]:CA
Organizational Unit Name (eg, section) []:.
Common Name (eg, your name or your server's hostname) []:www1.example.com
Email Address []:

Please enter the following 'extra' attributes
to be sent with your certificate request
A challenge password []:
An optional company name []:
★中間CA証明書のPrivate keyでEE証明書に署名し、発行する。
(/SCA01-EE-S02/SCA01-EE-S02ecc_csr.pemを使用し、有効期間825日で発行)
cd /etc/pki/tls/myca/SCA01
openssl ca -config /etc/pki/tls/myca/SCA01-EE-S02/openssl-SCA01-EE-S02.cnf -create_serial -batch -in ../SCA01-EE-S02/SCA01-EE-S02_csr.pem -keyfile private/cakey.pem -cert cacert.pem -out ../SCA01-EE-S02/SCA01-EE-S02.crt -policy policy_anything
PEM pass phrase(例)2222a
サーバ証明書を検証
cd /etc/pki/tls/myca
openssl verify -CAfile RS01-chain.pem SCA01-EE-S02/SCA01-EE-S02.crt
(5)中間CAからEE証明書向けCRL作成
【スキップしてよい項目】
EE証明書の失効を行う場合は実行する。(※失効しない場合、失効は実施せず「CRL作成」に進む)
-crl_reason reason(失効理由)は、unspecified, keyCompromise, CACompromise, affiliationChanged, superseded, cessationOfOperation, certificateHold or removeFromCRLから選択する。
失効コマンド
openssl ca -config /etc/pki/tls/myca/SCA01-EE-S01/openssl-SCA01-EE-S01.cnf -gencrl -revoke /etc/pki/tls/myca/SCA01-EE-S01/SCA01-EE-S01.crt -crl_reason supersededPEM pass phrase(例)2222a
CRL作成
SCA01-EE-S01のCnfファイルを参照して作成。
openssl ca -config /etc/pki/tls/myca/SCA01-EE-S01/openssl-SCA01-EE-S01.cnf -gencrl -out /etc/pki/tls/myca/SCA01/crl.pemPEM pass phrase(例)2222a
CRLをPEMからDERに変換
openssl crl -in /etc/pki/tls/myca/SCA01/crl.pem -outform DER -out /etc/pki/tls/myca/SCA01/crl.derEE証明書のシリアルナンバーが記載されたCRL内容確認
openssl crl -in /etc/pki/tls/myca/SCA01/crl.der -inform DER -text -noout(6)Root CAから中間CA証明書向けCRL作成
【スキップしてよい項目】
中間CA証明書失効を行う場合は実行する。(※失効しない場合、失効は実施せず「CRL作成」に進む)
-crl_reason reason(失効理由)は、unspecified, keyCompromise, CACompromise, affiliationChanged, superseded, cessationOfOperation, certificateHold or removeFromCRLから選択する。
失効コマンド
openssl ca -config /etc/pki/tls/myca/RCA/openssl-RCA.cnf -gencrl -revoke /etc/pki/tls/myca/SCA01/cacert.pem -crl_reason supersededPEM pass phrase(例)1111a
CRL作成
SCA01のCnfファイルを参照して作成。
openssl ca -config /etc/pki/tls/myca/SCA01/openssl-SCA01.cnf -gencrl -out /etc/pki/tls/myca/RCA/crl.pemPEM pass phrase(例)1111a
CRLをPEMからDERに変換
openssl crl -in /etc/pki/tls/myca/RCA/crl.pem -outform DER -out /etc/pki/tls/myca/RCA/crl.der中間CA証明書のシリアルナンバーが記載されたCRL内容確認
openssl crl -in /etc/pki/tls/myca/RCA/crl.der -inform DER -text -nooutApacheインストール
yum install httpd yum install mod_sslファイアウォール自動起動の無効化
# 有効化
systemctl enable firewalld

# 無効化
systemctl disable firewalld

# 状態確認
systemctl is-enabled firewalld
Apache起動
systemctl start httpdApache自動起動設定
systemctl enable httpdファイアウォールの停止
# 起動
systemctl start firewalld

# 停止
systemctl stop firewalld
SELinux Off
/etc/selinux/configで、以下の値に修正し、OS再起動する。
SELINUX=disabledOS再起動
rebootApacheの設定についてはこちらを参照
参考:apache 2.4におけるSSL証明書の設定
Apache 2.4.8以降、SSLCertificateChainFileが廃止され、
中間CA証明書はEE証明書と結合して、SSLCertificateFileにする。
参考:Apache Module mod_ssl
Apacheを安全な設定にする方法
参考:Mozilla SSL Configuration Generator
参考:デフォルト値 /etc/httpd/conf/httpd.conf
#
# This is the main Apache HTTP server configuration file.  It contains the
# configuration directives that give the server its instructions.
# See <URL:http://httpd.apache.org/docs/2.4/> for detailed information.
# In particular, see
# <URL:http://httpd.apache.org/docs/2.4/mod/directives.html>
# for a discussion of each configuration directive.
#
# See the httpd.conf(5) man page for more information on this configuration,
# and httpd.service(8) on using and configuring the httpd service.
#
# Do NOT simply read the instructions in here without understanding
# what they do.  They're here only as hints or reminders.  If you are unsure
# consult the online docs. You have been warned.
#
# Configuration and logfile names: If the filenames you specify for many
# of the server's control files begin with "/" (or "drive:/" for Win32), the
# server will use that explicit path.  If the filenames do *not* begin
# with "/", the value of ServerRoot is prepended -- so 'log/access_log'
# with ServerRoot set to '/www' will be interpreted by the
# server as '/www/log/access_log', where as '/log/access_log' will be
# interpreted as '/log/access_log'.

#
# ServerRoot: The top of the directory tree under which the server's
# configuration, error, and log files are kept.
#
# Do not add a slash at the end of the directory path.  If you point
# ServerRoot at a non-local disk, be sure to specify a local disk on the
# Mutex directive, if file-based mutexes are used.  If you wish to share the
# same ServerRoot for multiple httpd daemons, you will need to change at
# least PidFile.
#
ServerRoot "/etc/httpd"

#
# Listen: Allows you to bind Apache to specific IP addresses and/or
# ports, instead of the default. See also the <VirtualHost>
# directive.
#
# Change this to Listen on specific IP addresses as shown below to
# prevent Apache from glomming onto all bound IP addresses.
#
#Listen 12.34.56.78:80
Listen 80

#
# Dynamic Shared Object (DSO) Support
#
# To be able to use the functionality of a module which was built as a DSO you
# have to place corresponding `LoadModule' lines at this location so the
# directives contained in it are actually available _before_ they are used.
# Statically compiled modules (those listed by `httpd -l') do not need
# to be loaded here.
#
# Example:
# LoadModule foo_module modules/mod_foo.so
#
Include conf.modules.d/*.conf

#
# If you wish httpd to run as a different user or group, you must run
# httpd as root initially and it will switch.
#
# User/Group: The name (or #number) of the user/group to run httpd as.
# It is usually good practice to create a dedicated user and group for
# running httpd, as with most system services.
#
User apache
Group apache

# 'Main' server configuration
#
# The directives in this section set up the values used by the 'main'
# server, which responds to any requests that aren't handled by a
# <VirtualHost> definition.  These values also provide defaults for
# any <VirtualHost> containers you may define later in the file.
#
# All of these directives may appear inside <VirtualHost> containers,
# in which case these default settings will be overridden for the
# virtual host being defined.
#

#
# ServerAdmin: Your address, where problems with the server should be
# e-mailed.  This address appears on some server-generated pages, such
# as error documents.  e.g. admin@your-domain.com
#
ServerAdmin root@localhost

#
# ServerName gives the name and port that the server uses to identify itself.
# This can often be determined automatically, but we recommend you specify
# it explicitly to prevent problems during startup.
#
# If your host doesn't have a registered DNS name, enter its IP address here.
#
#ServerName www.example.com:80

#
# Deny access to the entirety of your server's filesystem. You must
# explicitly permit access to web content directories in other
# <Directory> blocks below.
#
<Directory />
    AllowOverride none
    Require all denied
</Directory>

#
# Note that from this point forward you must specifically allow
# particular features to be enabled - so if something's not working as
# you might expect, make sure that you have specifically enabled it
# below.
#

#
# DocumentRoot: The directory out of which you will serve your
# documents. By default, all requests are taken from this directory, but
# symbolic links and aliases may be used to point to other locations.
#
DocumentRoot "/var/www/html"

#
# Relax access to content within /var/www.
#
<Directory "/var/www">
    AllowOverride None
    # Allow open access:
    Require all granted
</Directory>

# Further relax access to the default document root:
<Directory "/var/www/html">
    #
    # Possible values for the Options directive are "None", "All",
    # or any combination of:
    #   Indexes Includes FollowSymLinks SymLinksifOwnerMatch ExecCGI MultiViews
    #
    # Note that "MultiViews" must be named *explicitly* --- "Options All"
    # doesn't give it to you.
    #
    # The Options directive is both complicated and important.  Please see
    # http://httpd.apache.org/docs/2.4/mod/core.html#options
    # for more information.
    #
    Options Indexes FollowSymLinks

    #
    # AllowOverride controls what directives may be placed in .htaccess files.
    # It can be "All", "None", or any combination of the keywords:
    #   Options FileInfo AuthConfig Limit
    #
    AllowOverride None

    #
    # Controls who can get stuff from this server.
    #
    Require all granted
</Directory>

#
# DirectoryIndex: sets the file that Apache will serve if a directory
# is requested.
#
<IfModule dir_module>
    DirectoryIndex index.html
</IfModule>

#
# The following lines prevent .htaccess and .htpasswd files from being
# viewed by Web clients.
#
<Files ".ht*">
    Require all denied
</Files>

#
# ErrorLog: The location of the error log file.
# If you do not specify an ErrorLog directive within a <VirtualHost>
# container, error messages relating to that virtual host will be
# logged here.  If you *do* define an error logfile for a <VirtualHost>
# container, that host's errors will be logged there and not here.
#
ErrorLog "logs/error_log"

#
# LogLevel: Control the number of messages logged to the error_log.
# Possible values include: debug, info, notice, warn, error, crit,
# alert, emerg.
#
LogLevel warn

<IfModule log_config_module>
    #
    # The following directives define some format nicknames for use with
    # a CustomLog directive (see below).
    #
    LogFormat "%h %l %u %t \"%r\" %>s %b \"%{Referer}i\" \"%{User-Agent}i\"" combined
    LogFormat "%h %l %u %t \"%r\" %>s %b" common

    <IfModule logio_module>
      # You need to enable mod_logio.c to use %I and %O
      LogFormat "%h %l %u %t \"%r\" %>s %b \"%{Referer}i\" \"%{User-Agent}i\" %I %O" combinedio
    </IfModule>

    #
    # The location and format of the access logfile (Common Logfile Format).
    # If you do not define any access logfiles within a <VirtualHost>
    # container, they will be logged here.  Contrariwise, if you *do*
    # define per-<VirtualHost> access logfiles, transactions will be
    # logged therein and *not* in this file.
    #
    #CustomLog "logs/access_log" common

    #
    # If you prefer a logfile with access, agent, and referer information
    # (Combined Logfile Format) you can use the following directive.
    #
    CustomLog "logs/access_log" combined
</IfModule>

<IfModule alias_module>
    #
    # Redirect: Allows you to tell clients about documents that used to
    # exist in your server's namespace, but do not anymore. The client
    # will make a new request for the document at its new location.
    # Example:
    # Redirect permanent /foo http://www.example.com/bar

    #
    # Alias: Maps web paths into filesystem paths and is used to
    # access content that does not live under the DocumentRoot.
    # Example:
    # Alias /webpath /full/filesystem/path
    #
    # If you include a trailing / on /webpath then the server will
    # require it to be present in the URL.  You will also likely
    # need to provide a <Directory> section to allow access to
    # the filesystem path.

    #
    # ScriptAlias: This controls which directories contain server scripts.
    # ScriptAliases are essentially the same as Aliases, except that
    # documents in the target directory are treated as applications and
    # run by the server when requested rather than as documents sent to the
    # client.  The same rules about trailing "/" apply to ScriptAlias
    # directives as to Alias.
    #
    ScriptAlias /cgi-bin/ "/var/www/cgi-bin/"

</IfModule>

#
# "/var/www/cgi-bin" should be changed to whatever your ScriptAliased
# CGI directory exists, if you have that configured.
#
<Directory "/var/www/cgi-bin">
    AllowOverride None
    Options None
    Require all granted
</Directory>

<IfModule mime_module>
    #
    # TypesConfig points to the file containing the list of mappings from
    # filename extension to MIME-type.
    #
    TypesConfig /etc/mime.types

    #
    # AddType allows you to add to or override the MIME configuration
    # file specified in TypesConfig for specific file types.
    #
    #AddType application/x-gzip .tgz
    #
    # AddEncoding allows you to have certain browsers uncompress
    # information on the fly. Note: Not all browsers support this.
    #
    #AddEncoding x-compress .Z
    #AddEncoding x-gzip .gz .tgz
    #
    # If the AddEncoding directives above are commented-out, then you
    # probably should define those extensions to indicate media types:
    #
    AddType application/x-compress .Z
    AddType application/x-gzip .gz .tgz

    #
    # AddHandler allows you to map certain file extensions to "handlers":
    # actions unrelated to filetype. These can be either built into the server
    # or added with the Action directive (see below)
    #
    # To use CGI scripts outside of ScriptAliased directories:
    # (You will also need to add "ExecCGI" to the "Options" directive.)
    #
    #AddHandler cgi-script .cgi

    # For type maps (negotiated resources):
    #AddHandler type-map var

    #
    # Filters allow you to process content before it is sent to the client.
    #
    # To parse .shtml files for server-side includes (SSI):
    # (You will also need to add "Includes" to the "Options" directive.)
    #
    AddType text/html .shtml
    AddOutputFilter INCLUDES .shtml
</IfModule>

#
# Specify a default charset for all content served; this enables
# interpretation of all content as UTF-8 by default.  To use the
# default browser choice (ISO-8859-1), or to allow the META tags
# in HTML content to override this choice, comment out this
# directive:
#
AddDefaultCharset UTF-8

<IfModule mime_magic_module>
    #
    # The mod_mime_magic module allows the server to use various hints from the
    # contents of the file itself to determine its type.  The MIMEMagicFile
    # directive tells the module where the hint definitions are located.
    #
    MIMEMagicFile conf/magic
</IfModule>

#
# Customizable error responses come in three flavors:
# 1) plain text 2) local redirects 3) external redirects
#
# Some examples:
#ErrorDocument 500 "The server made a boo boo."
#ErrorDocument 404 /missing.html
#ErrorDocument 404 "/cgi-bin/missing_handler.pl"
#ErrorDocument 402 http://www.example.com/subscription_info.html
#

#
# EnableMMAP and EnableSendfile: On systems that support it,
# memory-mapping or the sendfile syscall may be used to deliver
# files.  This usually improves server performance, but must
# be turned off when serving from networked-mounted
# filesystems or if support for these functions is otherwise
# broken on your system.
# Defaults if commented: EnableMMAP On, EnableSendfile Off
#
#EnableMMAP off
EnableSendfile on

# Supplemental configuration
#
# Load config files in the "/etc/httpd/conf.d" directory, if any.
IncludeOptional conf.d/*.conf
参考:デフォルト値 /etc/httpd/conf.d/ssl.conf
#
# When we also provide SSL we have to listen to the
# standard HTTPS port in addition.
#
Listen 443 https

##
##  SSL Global Context
##
##  All SSL configuration in this context applies both to
##  the main server and all SSL-enabled virtual hosts.
##

#   Pass Phrase Dialog:
#   Configure the pass phrase gathering process.
#   The filtering dialog program (`builtin' is a internal
#   terminal dialog) has to provide the pass phrase on stdout.
SSLPassPhraseDialog exec:/usr/libexec/httpd-ssl-pass-dialog

#   Inter-Process Session Cache:
#   Configure the SSL Session Cache: First the mechanism
#   to use and second the expiring timeout (in seconds).
SSLSessionCache         shmcb:/run/httpd/sslcache(512000)
SSLSessionCacheTimeout  300

#
# Use "SSLCryptoDevice" to enable any supported hardware
# accelerators. Use "openssl engine -v" to list supported
# engine names.  NOTE: If you enable an accelerator and the
# server does not start, consult the error logs and ensure
# your accelerator is functioning properly.
#
SSLCryptoDevice builtin
#SSLCryptoDevice ubsec

##
## SSL Virtual Host Context
##

<VirtualHost _default_:443>

# General setup for the virtual host, inherited from global configuration
#DocumentRoot "/var/www/html"
#ServerName www.example.com:443

# Use separate log files for the SSL virtual host; note that LogLevel
# is not inherited from httpd.conf.
ErrorLog logs/ssl_error_log
TransferLog logs/ssl_access_log
LogLevel warn

#   SSL Engine Switch:
#   Enable/Disable SSL for this virtual host.
SSLEngine on

#   List the protocol versions which clients are allowed to connect with.
#   The OpenSSL system profile is used by default.  See
#   update-crypto-policies(8) for more details.
#SSLProtocol all -SSLv3
#SSLProxyProtocol all -SSLv3

#   User agents such as web browsers are not configured for the user's
#   own preference of either security or performance, therefore this
#   must be the prerogative of the web server administrator who manages
#   cpu load versus confidentiality, so enforce the server's cipher order.
SSLHonorCipherOrder on

#   SSL Cipher Suite:
#   List the ciphers that the client is permitted to negotiate.
#   See the mod_ssl documentation for a complete list.
#   The OpenSSL system profile is configured by default.  See
#   update-crypto-policies(8) for more details.
SSLCipherSuite PROFILE=SYSTEM
SSLProxyCipherSuite PROFILE=SYSTEM

#   Point SSLCertificateFile at a PEM encoded certificate.  If
#   the certificate is encrypted, then you will be prompted for a
#   pass phrase.  Note that restarting httpd will prompt again.  Keep
#   in mind that if you have both an RSA and a DSA certificate you
#   can configure both in parallel (to also allow the use of DSA
#   ciphers, etc.)
#   Some ECC cipher suites (http://www.ietf.org/rfc/rfc4492.txt)
#   require an ECC certificate which can also be configured in
#   parallel.
SSLCertificateFile /etc/pki/tls/certs/localhost.crt

#   Server Private Key:
#   If the key is not combined with the certificate, use this
#   directive to point at the key file.  Keep in mind that if
#   you've both a RSA and a DSA private key you can configure
#   both in parallel (to also allow the use of DSA ciphers, etc.)
#   ECC keys, when in use, can also be configured in parallel
SSLCertificateKeyFile /etc/pki/tls/private/localhost.key

#   Server Certificate Chain:
#   Point SSLCertificateChainFile at a file containing the
#   concatenation of PEM encoded CA certificates which form the
#   certificate chain for the server certificate. Alternatively
#   the referenced file can be the same as SSLCertificateFile
#   when the CA certificates are directly appended to the server
#   certificate for convenience.
#SSLCertificateChainFile /etc/pki/tls/certs/server-chain.crt

#   Certificate Authority (CA):
#   Set the CA certificate verification path where to find CA
#   certificates for client authentication or alternatively one
#   huge file containing all of them (file must be PEM encoded)
#SSLCACertificateFile /etc/pki/tls/certs/ca-bundle.crt

#   Client Authentication (Type):
#   Client certificate verification type and depth.  Types are
#   none, optional, require and optional_no_ca.  Depth is a
#   number which specifies how deeply to verify the certificate
#   issuer chain before deciding the certificate is not valid.
#SSLVerifyClient require
#SSLVerifyDepth  10

#   Access Control:
#   With SSLRequire you can do per-directory access control based
#   on arbitrary complex boolean expressions containing server
#   variable checks and other lookup directives.  The syntax is a
#   mixture between C and Perl.  See the mod_ssl documentation
#   for more details.
#<Location />
#SSLRequire (    %{SSL_CIPHER} !~ m/^(EXP|NULL)/ \
#            and %{SSL_CLIENT_S_DN_O} eq "Snake Oil, Ltd." \
#            and %{SSL_CLIENT_S_DN_OU} in {"Staff", "CA", "Dev"} \
#            and %{TIME_WDAY} >= 1 and %{TIME_WDAY} <= 5 \
#            and %{TIME_HOUR} >= 8 and %{TIME_HOUR} <= 20       ) \
#           or %{REMOTE_ADDR} =~ m/^192\.76\.162\.[0-9]+$/
#</Location>

#   SSL Engine Options:
#   Set various options for the SSL engine.
#   o FakeBasicAuth:
#     Translate the client X.509 into a Basic Authorisation.  This means that
#     the standard Auth/DBMAuth methods can be used for access control.  The
#     user name is the `one line' version of the client's X.509 certificate.
#     Note that no password is obtained from the user. Every entry in the user
#     file needs this password: `xxj31ZMTZzkVA'.
#   o ExportCertData:
#     This exports two additional environment variables: SSL_CLIENT_CERT and
#     SSL_SERVER_CERT. These contain the PEM-encoded certificates of the
#     server (always existing) and the client (only existing when client
#     authentication is used). This can be used to import the certificates
#     into CGI scripts.
#   o StdEnvVars:
#     This exports the standard SSL/TLS related `SSL_*' environment variables.
#     Per default this exportation is switched off for performance reasons,
#     because the extraction step is an expensive operation and is usually
#     useless for serving static content. So one usually enables the
#     exportation for CGI and SSI requests only.
#   o StrictRequire:
#     This denies access when "SSLRequireSSL" or "SSLRequire" applied even
#     under a "Satisfy any" situation, i.e. when it applies access is denied
#     and no other module can change it.
#   o OptRenegotiate:
#     This enables optimized SSL connection renegotiation handling when SSL
#     directives are used in per-directory context.
#SSLOptions +FakeBasicAuth +ExportCertData +StrictRequire
<FilesMatch "\.(cgi|shtml|phtml|php)$">
    SSLOptions +StdEnvVars
</FilesMatch>
<Directory "/var/www/cgi-bin">
    SSLOptions +StdEnvVars
</Directory>

#   SSL Protocol Adjustments:
#   The safe and default but still SSL/TLS standard compliant shutdown
#   approach is that mod_ssl sends the close notify alert but doesn't wait for
#   the close notify alert from client. When you need a different shutdown
#   approach you can use one of the following variables:
#   o ssl-unclean-shutdown:
#     This forces an unclean shutdown when the connection is closed, i.e. no
#     SSL close notify alert is sent or allowed to be received.  This violates
#     the SSL/TLS standard but is needed for some brain-dead browsers. Use
#     this when you receive I/O errors because of the standard approach where
#     mod_ssl sends the close notify alert.
#   o ssl-accurate-shutdown:
#     This forces an accurate shutdown when the connection is closed, i.e. a
#     SSL close notify alert is sent and mod_ssl waits for the close notify
#     alert of the client. This is 100% SSL/TLS standard compliant, but in
#     practice often causes hanging connections with brain-dead browsers. Use
#     this only for browsers where you know that their SSL implementation
#     works correctly.
#   Notice: Most problems of broken clients are also related to the HTTP
#   keep-alive facility, so you usually additionally want to disable
#   keep-alive for those clients, too. Use variable "nokeepalive" for this.
#   Similarly, one has to force some clients to use HTTP/1.0 to workaround
#   their broken HTTP/1.1 implementation. Use variables "downgrade-1.0" and
#   "force-response-1.0" for this.
BrowserMatch "MSIE [2-5]" \
         nokeepalive ssl-unclean-shutdown \
         downgrade-1.0 force-response-1.0

#   Per-Server Logging:
#   The home of a custom SSL log file. Use this when you want a
#   compact non-error SSL logfile on a virtual host basis.
CustomLog logs/ssl_request_log \
          "%t %h %{SSL_PROTOCOL}x %{SSL_CIPHER}x \"%r\" %b"

</VirtualHost>
Apacheに証明書設定とCRL公開
・Root CA証明書コピー
・中間CA証明書コピー
・CRL(SCA01が署名)コピー
・CRL(RCAが署名)コピー
・証明書コピー
/etc/httpd/conf.dの初期値の場所にコピーする。
SSLCertificateFile /etc/pki/tls/certs/localhost.crt
・証明書Private keyコピー
/etc/httpd/conf.dの初期値の場所にコピーする。
SSLCertificateKeyFile /etc/pki/tls/private/localhost.key
・再起動
CA証明書は、PEMファイルをDERファイルに変換し、コピーする。
コマンドの最初に「\」を入れると上書き、削除時に確認されない。
openssl x509 -in /etc/pki/tls/myca/RCA/cacert.pem -inform PEM -out /etc/pki/tls/myca/RCA/RCA.crt -outform DER
openssl x509 -in /etc/pki/tls/myca/SCA01/cacert.pem -inform PEM -out /etc/pki/tls/myca/SCA01/SCA01.crt -outform DER
Apacheのフォルダーにコピー。
\cp /etc/pki/tls/myca/RCA/RCA.crt /var/www/html/RCA.crt
\cp /etc/pki/tls/myca/SCA01/SCA01.crt /var/www/html/SCA01.crt
\cp /etc/pki/tls/myca/SCA01/crl.der /etc/pki/tls/myca/SCA01/SCA01crl.crl
\cp /etc/pki/tls/myca/RCA/crl.der /etc/pki/tls/myca/RCA/RCAcrl.crl
\cp /etc/pki/tls/myca/SCA01/SCA01crl.crl /var/www/html/SCA01crl.crl
\cp /etc/pki/tls/myca/RCA/RCAcrl.crl /var/www/html/RCAcrl.crl
\cp /etc/pki/tls/myca/SCA01-EE-S01/SCA01-EE-S01.crt /etc/pki/tls/myca/SCA01-EE-S01/localhost-no-chain.crt
\cp /etc/pki/tls/myca/SCA01-EE-S01/SCA01-EE-S01_key.pem /etc/pki/tls/private/localhost.key
cat /etc/pki/tls/myca/SCA01-EE-S01/localhost-no-chain.crt /etc/pki/tls/myca/RS01-chain.pem >> /etc/pki/tls/myca/SCA01-EE-S01/localhost.crt
\cp /etc/pki/tls/myca/SCA01-EE-S01/localhost.crt /etc/pki/tls/certs/localhost.crt
systemctl restart httpd
ウェブコンテンツの配置
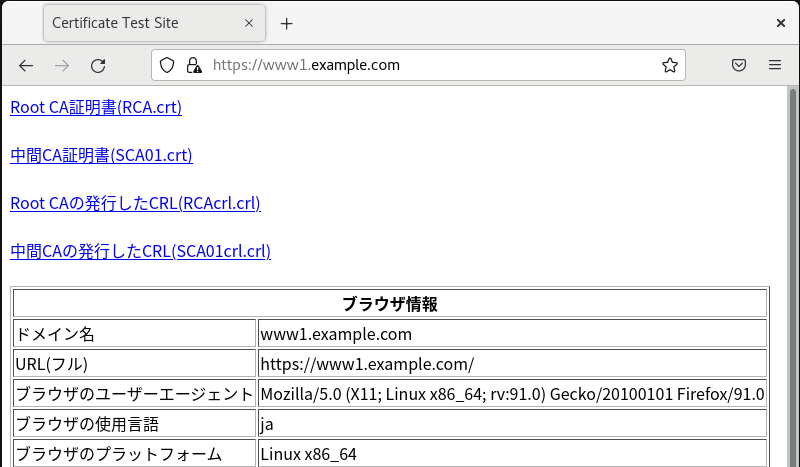
/var/www/html/index.html
<!DOCTYPE HTML>
<html>
<head>
<meta http-equiv="Content-Type" content="text/html; charset=UTF-8" />
<title>CA Repository</title>
<meta name="theme-color" content="#000044">
</head>
<body>
<font size="5"><b>CA Repository</b></font><br><br>
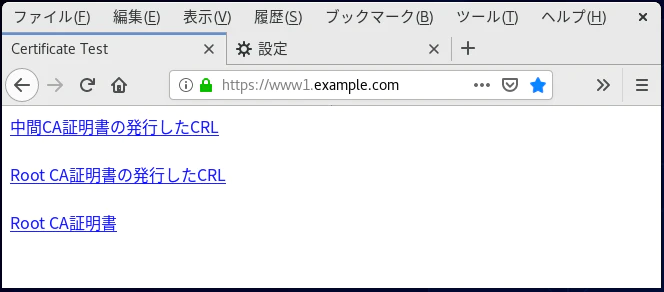
<a href="RCA.crt">Root CA証明書(RCA.crt)</a><br><br>
<a href="SCA01.crt">中間CA証明書(SCA01.crt)</a><br><br>
<a href="RCAcrl.crl">Root CAの発行したCRL(RCAcrl.crl)</a><br><br>
<a href="SCA01crl.crl">中間CAの発行したCRL(SCA01crl.crl)</a><br><br>
<script type="text/javascript">
<!--
document.write('<table border="1" style="background-color: #ffffff;">');
document.write('<tr><th colspan="2">ブラウザ情報</th></tr>');
document.write('<tr><td>ドメイン名</td><td>' + document.domain + '</td></tr>');
document.write('<tr><td>URL(フル)</td><td>' + location.href + '</td></tr>');
document.write('<tr><td>ブラウザのユーザーエージェント</td><td>' + navigator.userAgent + '</td></tr>');
document.write('<tr><td>ブラウザの使用言語</td><td>' + navigator.language + '</td></tr>');
document.write('<tr><td>ブラウザのプラットフォーム</td><td>' + navigator.platform + '</td></tr>');
document.write('<tr><td>スクリーンの幅</td><td>' + screen.width + '</td></tr>');
document.write('<tr><td>スクリーンの高さ</td><td>' + screen.height + '</td></tr>');
document.write('<tr><td>スクリーンの色深度(bit)</td><td>' + screen.colorDepth + '</td></tr>');
document.write('<tr><td>ブラウザのビューポートの幅</td><td>' + window.innerWidth + '</td></tr>');
document.write('<tr><td>ブラウザのビューポートの高さ</td><td>' + window.innerHeight + '</td></tr>');
document.write('<tr><td>デバイスピクセル比</td><td>' + window.devicePixelRatio + '</td></tr>');
document.write('<tr><td>タッチ操作可能</td><td>' + navigator.pointerEnabled + '</td></tr>');
document.write('<tr><td>最大同時タッチ数</td><td>' + navigator.maxTouchPoints + '</td></tr>');
document.write('</table>');
// -->
</script>
</body>
</html>Cent OSのhostsファイル編集
vim /etc/hosts「127.0.0.1」に「www1.example.com」を追記
/etc/hosts
127.0.0.1   localhost localhost.localdomain localhost4 localhost4.localdomain4 www1.example.com
::1         localhost localhost.localdomain localhost6 localhost6.localdomain6
FirefoxにRoot CA証明書のインポート

「Root CA証明書」をダウンロード
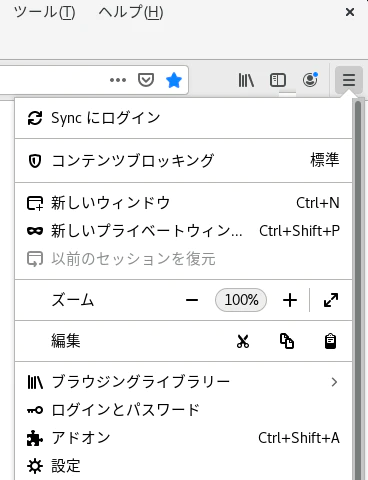
証明書を表示…(C)
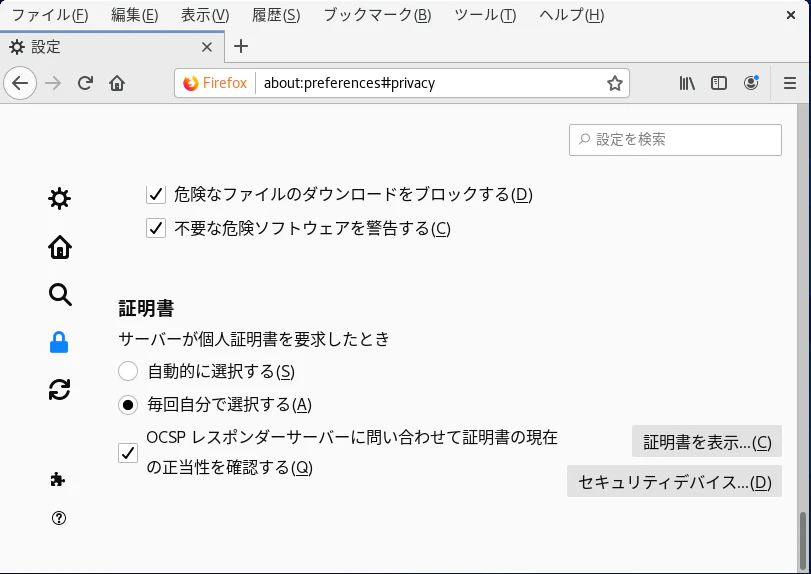
インポート(M)…
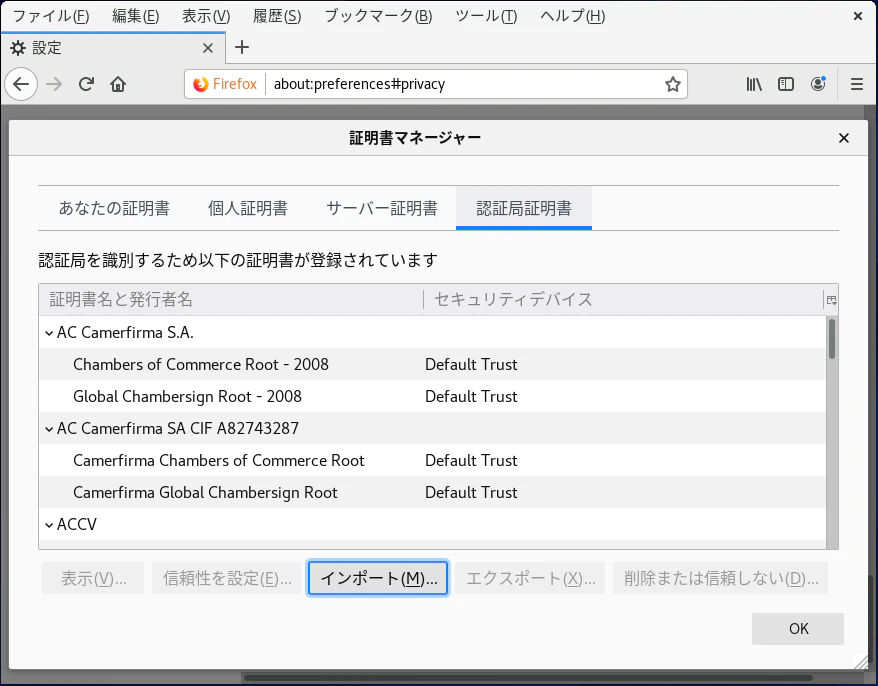
鍵マークが安全な接続表示になる
Windowsのhostsファイル変更
以下ファイルは、メモ帳を管理者モードで起動してファイル編集する。
C:\Windows\System32\drivers\etc
hosts
http://192.168.111.201 へは、以下URLでアクセスできるようになる。
http://www1.example.com
hosts
# Copyright (c) 1993-2009 Microsoft Corp.
#
# This is a sample HOSTS file used by Microsoft TCP/IP for Windows.
#
# This file contains the mappings of IP addresses to host names. Each
# entry should be kept on an individual line. The IP address should
# be placed in the first column followed by the corresponding host name.
# The IP address and the host name should be separated by at least one
# space.
#
# Additionally, comments (such as these) may be inserted on individual
# lines or following the machine name denoted by a '#' symbol.
#
# For example:
#
#      102.54.94.97     rhino.acme.com          # source server
#       38.25.63.10     x.acme.com              # x client host

# localhost name resolution is handled within DNS itself.
#	127.0.0.1       localhost
#	::1             localhost
192.168.111.201 www1.example.com
192.168.111.202 www2.example.com
コマンドでチェーン状態の確認も可能。
openssl s_client -connect www1.example.com:443 -statusクライアント証明書を発行する場合は以下URLをご参照ください。
参考:クライアント証明書によるクライアント認証[Apache]
OCSPレスポンダー構築
【簡単】プライベート認証局でOCSPレスポンダー構築(OpenSSL) | Japanese PKI Blog (world-tls.com)
TLSクライアント認証証明書によるクライアント認証
TLSクライアント認証証明書によるクライアント認証を行う場合は、以下を参照。
TLSクライアント認証証明書によるクライアント認証[Apache] | Japanese PKI Blog (world-tls.com)
よく使うOpenSSLコマンド
証明書ファイルの内容を確認(上段:PEM、下段:DER)
openssl x509 -text -noout -in SCA01-EE-S01.crtopenssl x509 -text -inform der -in SCA01-EE-S01.derPrivate keyファイルの内容を確認
openssl rsa -text -noout -in SCA01-EE-S01_key.pemCSRファイルの内容を確認(上段:PEM、下段:DER)
openssl req -text -noout -in SCA01-EE-S01_csr.pemopenssl req -text -inform der -in SCA01-EE-S01_csr.derCRLファイルの内容を確認(上段:PEM、下段:DER)
openssl crl -text -noout -in crl.pemopenssl crl -text -inform der -in crl.derDERファイルをPEMファイルに変換
openssl x509 -in cert.der -inform DER -out cert.pem -outform PEMPEMファイルからDERファイルに変換
openssl x509 -in cert.pem -inform PEM -out cert.der -outform DERCAから発行された証明書とPrivate keyファイルからPFX(P12)ファイルに変換( -certfileは、追加でつけたい証明書で省略可)
openssl pkcs12 -export -out Output.pfx -inkey PrivateKey.key -in EEcert.crt -certfile Intermediate.crtiOS Safariの動作検証(TLSサーバー証明書の有効期間825日以下に)
有効期間が826日以上のTLSサーバー証明書の場合、エラー表示になる。
825日以下であれば正常に動作する。
ただし、プライベートIPアドレスの範囲(RFC 1918)に発行されている場合は、826日を超過していてもエラー表示されない。
クラスAは10.0.0.0~10.255.255.255 (10.0.0.0/8)
クラスBは172.16.0.0~172.31.255.255 (172.16.0.0/12)
クラスCは192.168.0.0~192.168.255.255 (192.168.0.0/16)
【エラー時の表示】
タイトル「接続はプライベートではありません」
本文「このWebサイトは、あなたの個人情報または金融情報を盗むために”xxxx.co.jp(FQDNが表示される)”になりすましている可能性があります。前のページに戻ってください。 詳細を表示 戻る」